craft chocolate

It's been a looooooong time, fam!

It's been a looooooong time, fam!

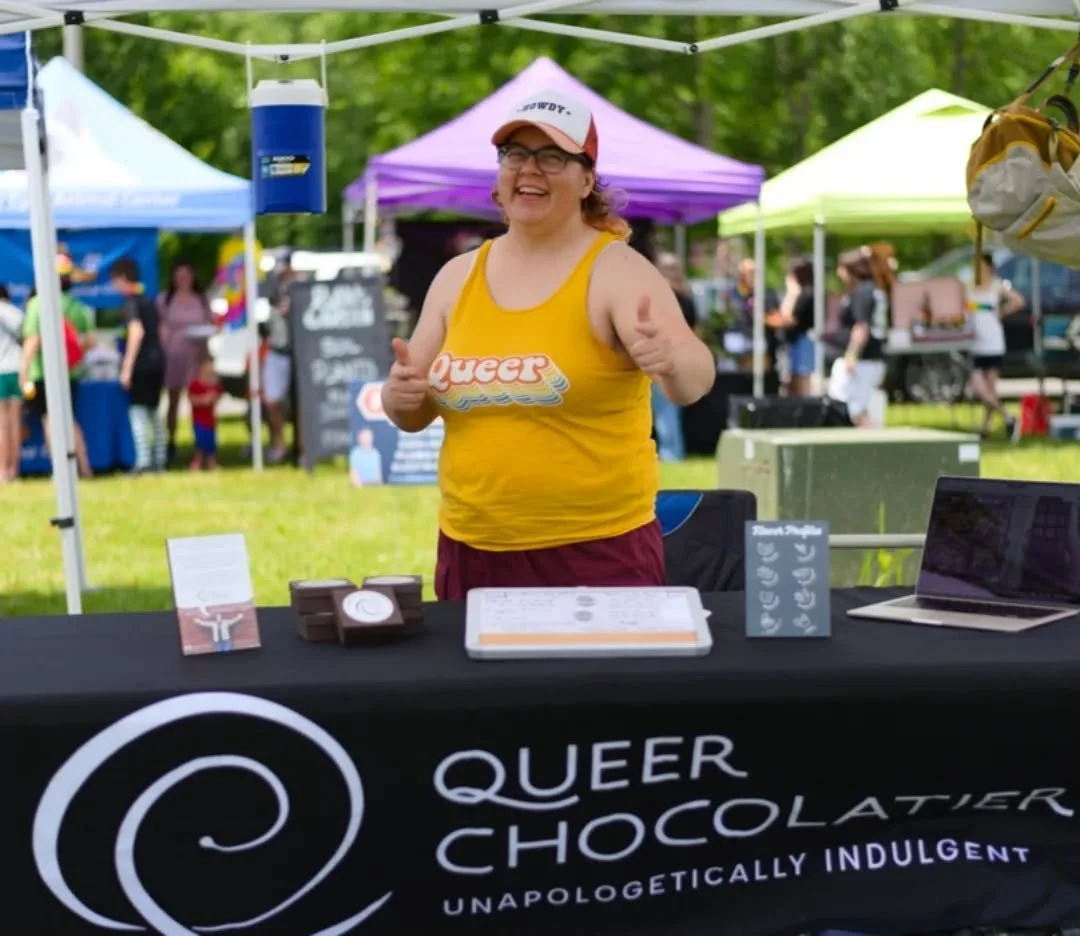
First time vending at Hendricks County Pride but not my first time with the good ol’ bisexual finger guns!

Returning to start from Square One has been quite the endeavor!

As I dusted off the blog, I realized I hadn’t posted in over two years… 105 weeks, to be specific.

I guess it would be simple but insufficient to say that a lot has changed in that period of time.

Please allow me to ramble an overview at you:


I Started Powerlifting

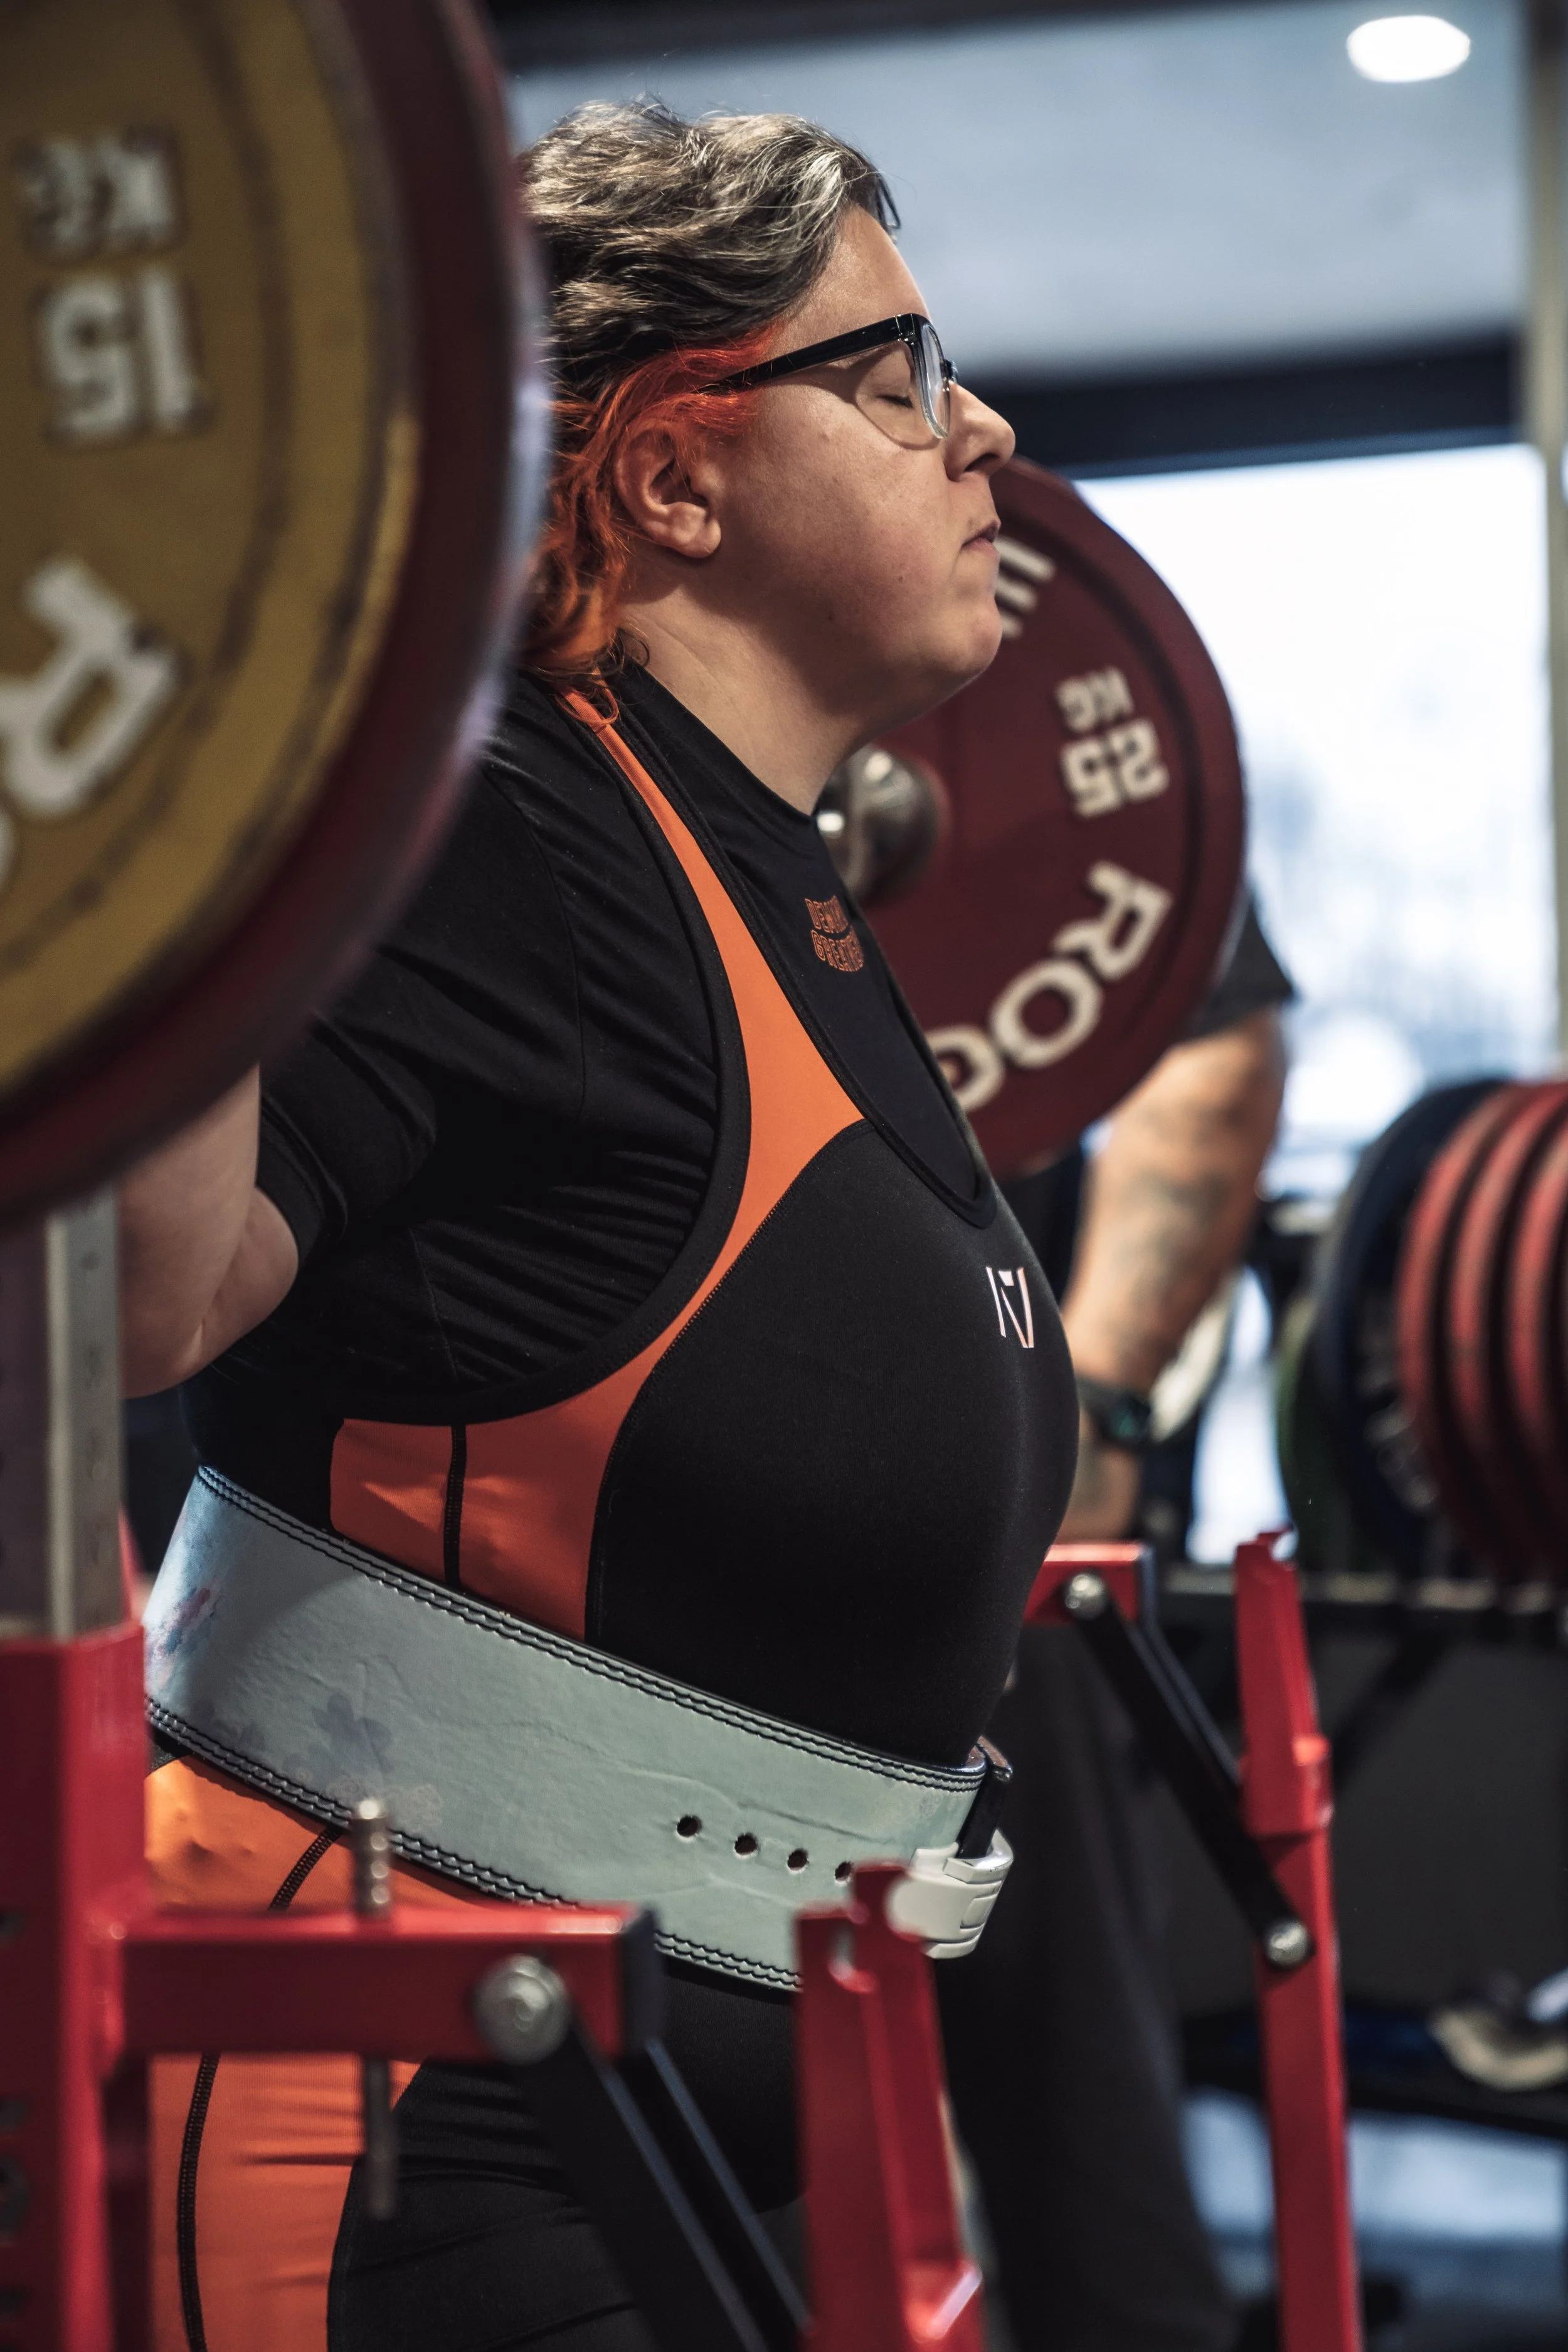
I hit a PR in my squat at my first powerlifting meet in December of 2024! 125kg (275 pounds)!

As a major push to work on my physical and mental health (both of which were in bad shape in 2023), I took up powerlifting in early 2024. And when I say I took up powerlifting, I caught fire. I absolutely fell in love with the sport and set a goal to compete in a meet before my 45th birthday.

Powerlifting helped me work through a lot of mental struggles and has played a role in helping me get my Type II Diabetes under control. I got my diagnosis in late 2023 and have been working hard to change some of my lifestyle to wrangle my A1c and blood sugar. I wanted to avoid medication if I could, but that hasn’t been the case for me so I am taking an all-tools-on-the-table approach while centering physical activity such as powerlifting as my main tool.

Two days before my birthday, I competed in a powerlifting meet and I hit two personal records (squat and deadlift)!

My best bench press is 83kg (183 pounds), my best squat is 125kg (275 pounds), and my best deadlift (although it didn’t count in the meet, I did get it lifted so I count it!) is 155kg (341 pounds) which totals up to 799 pounds and is both something I am really proud of and super frustrated by since I’m just one measly pound away from the 800-pound club!

I look forward to the day I get to return to the sport and grow as an athlete.

But, it will take some time because…


I Tore My ACL

This brace was my constant companion for several weeks.

I wish I had a glamorous story to go along with this injury, and I probably could come up with a delightful heroic tale, but it would not be anywhere close to the boring and sad reality of my experiencing a slip-and-fall.

I fell in late February 2025, had surgery in May, and have been in physical therapy nearly six months now with about a week to go before I’m considered to be capable of full work duties with no restrictions.

It makes me nervous as I am not fully recovered by a long shot and I am actually really scared of how I’m going to be able to recover when my physical therapy will come to its end.

My first visit with my surgeon laid out the expectations for me as well as a choice. He let me know that humans can function without an ACL just fine. I wouldn’t be able to stop/start really quickly, or pivot super well, or do anything that requires cutting and changing directions fast.

And at the age of 45, just starting a new stage of physical fitness in my life out of not only interest but for health, I was pretty sure I needed an ACL and opted for surgery.

Having that decision made, the conversation moved toward setting expectations for recovery.

I was told that I wouldn’t feel like myself for anywhere between 9-12 months.

I understood at the time how long it would be, but understanding and feeling are not the same.

I was fairly prepared for the physical journey but I have been underprepared for the mental and emotional toll the injury and surgery have taken on my well-being. I have struggled mightily at various points along the path but there have been moments where I feel like I could rightly celebrate milestones.

And as I’m nearing the halfway mark to that yearlong recovery, I’m at another low point since it will soon be the first time I’m left to my own care without any therapy and presumably not much more follow up with my doctor either.

My lonely travels are set to get lonelier…

But I have to be clear, even though it is a lonely struggle, I have not been alone. I have had people step closer to me and gave me comfort in ways I deeply appreciate and also…


I Got Married

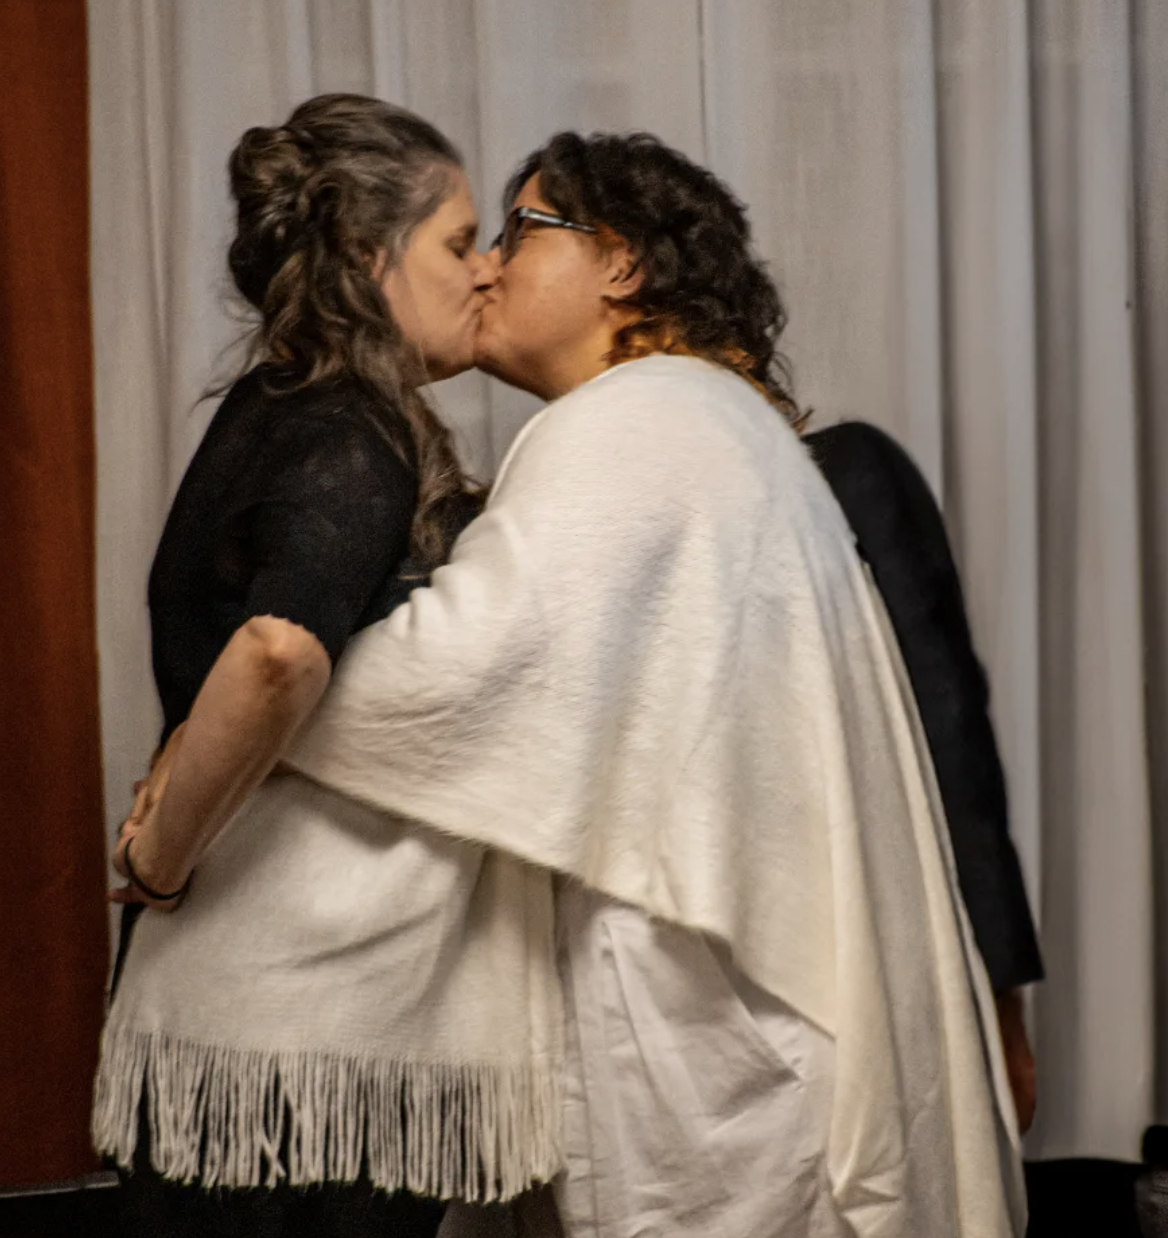
The moment Kathy became my wife.

I’ve known Kathy for several years now and have had the chance to call her a friend for the last few years as our circles and activities began to overlap more and more. It didn’t take long for me to develop a crush on her and I worked up the courage to ask her out on a date in the summer of 2024.

Powerlifting was a way for me to get strong enough to pick up chicks, I’d say with complete seriousness to anyone who would listen.

After our first date, I was plotting ways to physically pick up Kathy over my shoulder much to her chagrin and begrudging delight.

I was in love, what can I say?

And I’m even more in love today than any day before.

The world is a very challenging place for queer and trans folks and that weighs heavily on both of us beyond our own personal reasons as queer women. We work with marginalized populations, we volunteer and fundraise, and we sit with our community.

We got married on New Year’s Eve 2024 and while we deeply love each other, our timetable for our wedding was accelerated in no small part due to the political climate.

Who knows if same-sex marriage would come under attack? (Spoiler: we knew, every fucking queer person knew, and we are right).

But beyond same-sex marriage being vulnerable, we wanted to make sure we could align ourselves to better tackle issues our community faces such as housing and food insecurity, job discrimination, barriers to accessing evidence-based health care, all the way to harassment and violence. Kathy and I have found ways that we can do our best to help our neighbors who need help and I know that I couldn’t do as much without her as I do with her.

We aren’t stopping anytime soon, either!


I Relaunched Queer Chocolatier

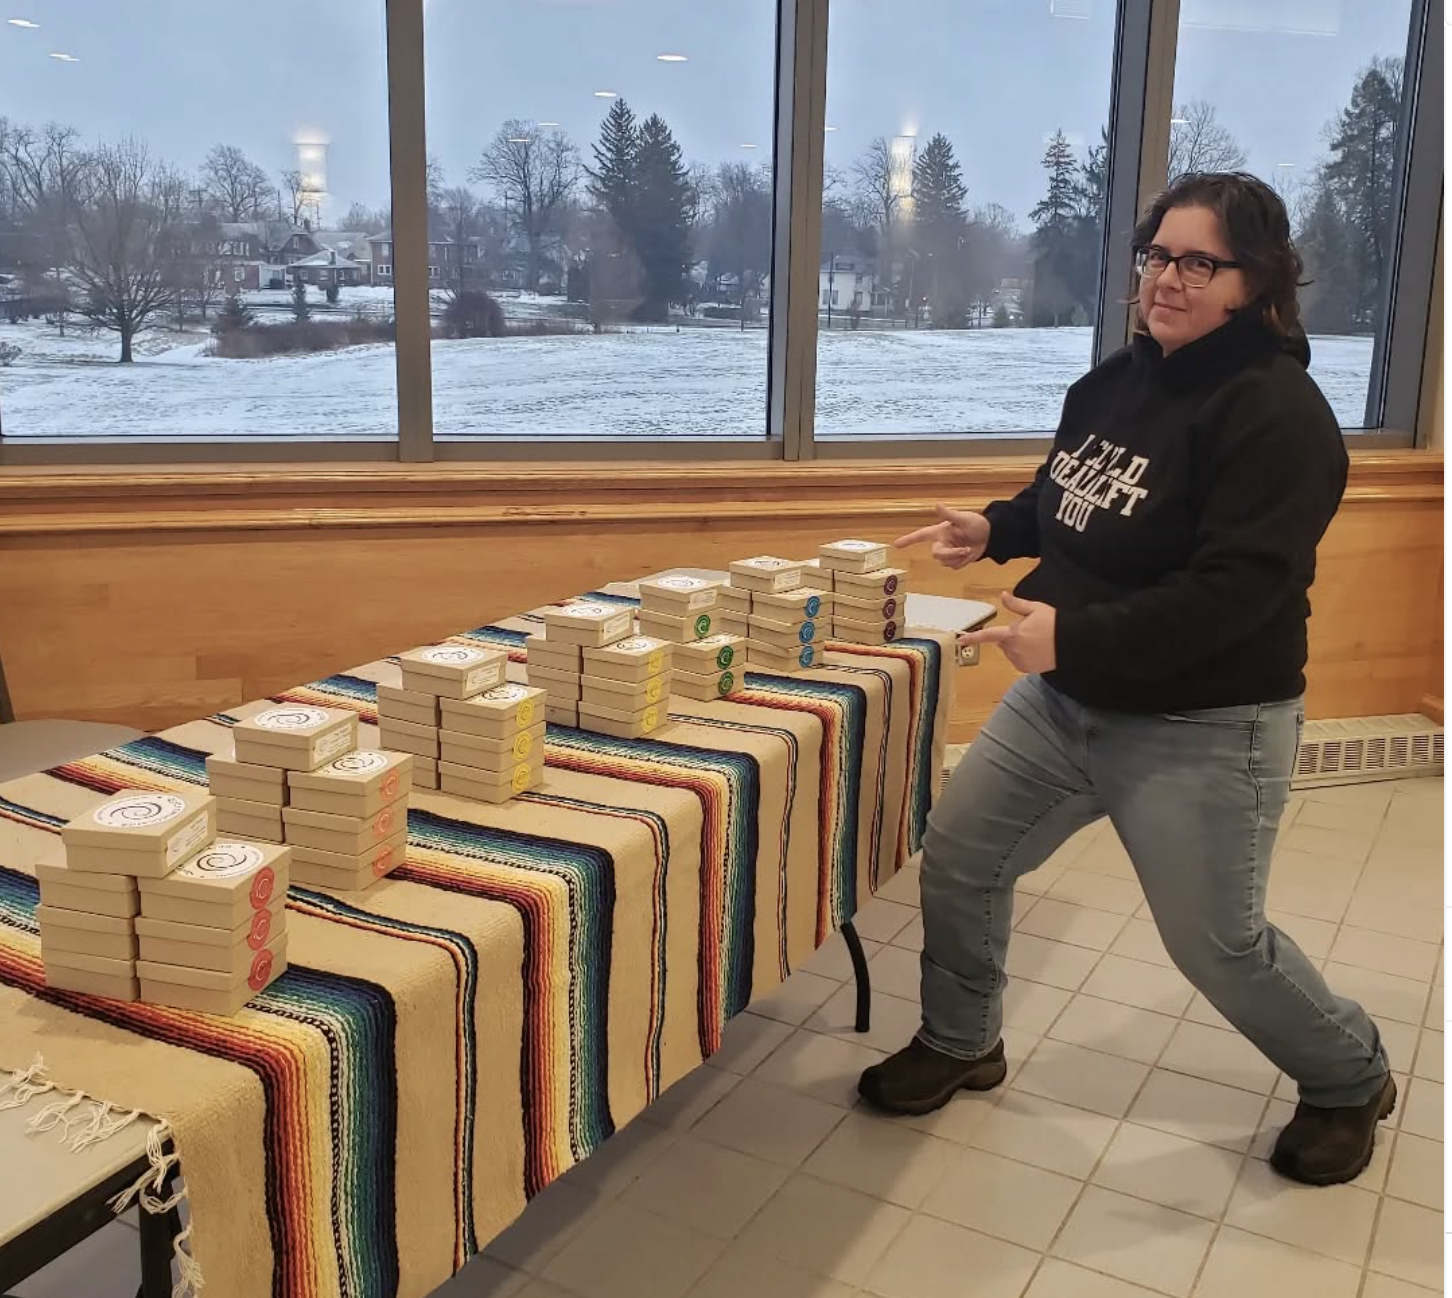
After my powerlifting meet but before I trashed my ACL I was able to set up for my first farmers market in over a year.

In January of 2025, I jumped back into operating Queer Chocolatier after a year-long hiatus.

Grace Episcopal Church in Muncie was an endlessly gracious (see what I did there!?) host and shared their certified kitchen with me for many months. But ultimately, it was getting challenging for me to navigate my mental health post-divorce and find the time and energy to make chocolate and juggle a day job let alone even consider my overall well-being.

I made the choice to put QC on hold while I work on healing in all the possible ways.

It was hard and painful to pause this business because I love it so deeply. Queer Chocolatier is where I find a lot of my purpose, to the point it’s all folded back on me and has become my identity in many respects.

The grieving process of stopping my business for an indeterminate length of time was as excruciating as it was necessary. It was only right for me to grieve something that has been an integral part of who I am for the previous six years.

I missed it deeply.

But after marrying Kathy and beginning the process of joining households and merging the lives of our whole family, I began considering the hows of relaunching Queer Chocolatier.

Kathy recommended I start small by being a home-based vendor.

I have been operating as such since the beginning of this year and it has led to many wonderful moments of creation and many moments of cramped kitchen frustrations. Chocolate machines and molds cover the counters. Pantries are chock-full of chocolate or ingredients to make chocolate or packaging to hold finished chocolate.

One estimate I’ve heard a well-established craft chocolate company give for the percentage of space that should be dedicated to storage in a facility making chocolate is at least 50% and I never took it to heart until becoming a home-based vendor!

But I’m back! Queer Chocolatier is here again and still queer, which doesn’t rhyme the way another version of that phrase is more often heard, but you get me.

Over the summer and into the fall, Queer Chocolatier traveled for the first time to five different small town Pride events throughout Indiana! I’d vended before at Muncie Pride and Pendleton Pride and was happy to return to both festivities, but this year I got to go to Hendricks County Pride, Zionsville Pride, and Fishers Pride!

I also returned to my roots and have been vending at the Minnetrista Farmers Market


I Create More

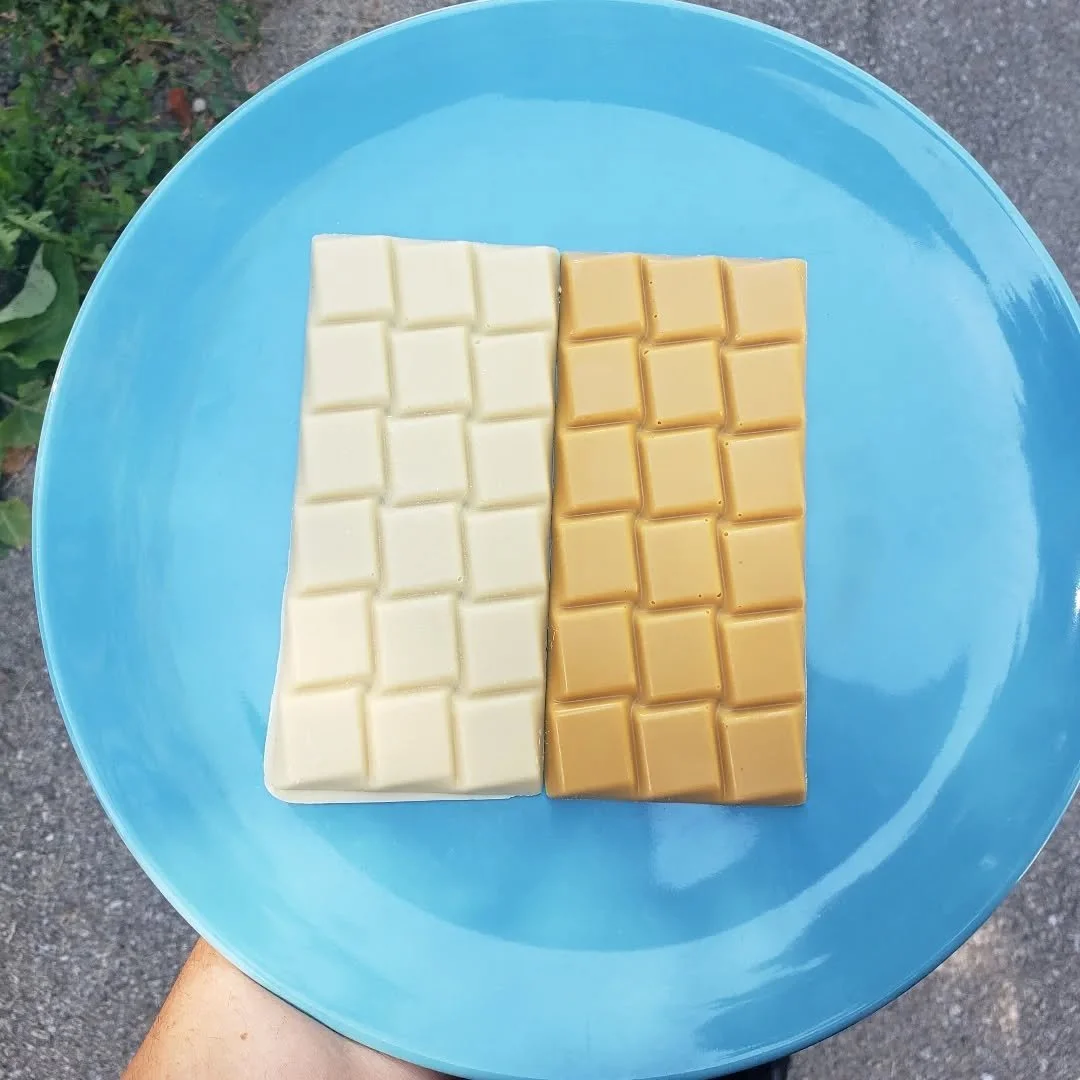
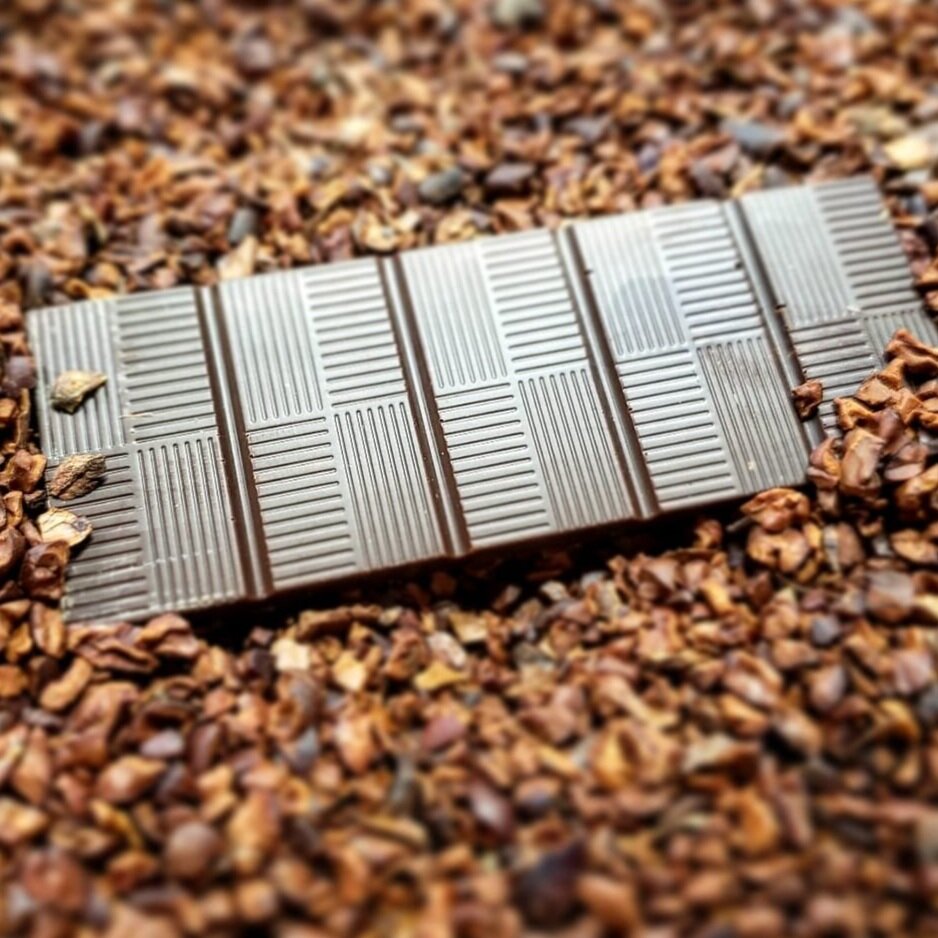
My chocolate-making skills expanded and deepened this year, including making new chocolate formulas such as my Buttermilk White Chocolate and Blond White Chocolate.

The relaunching of the business has given me many opportunities to experiment with new products and learn how to make new chocolates.

I’ve started making bars with more consistency and better quality.

I’ve started making a couple of white chocolate offerings, including a Blond White Chocolate that has me very excited.

I’ve developed a Malted Milk Chocolate and an espresso-infused bar I call the Up All Night bar.

I’ve started dipping products like pretzels and Teddy Grahams in tempered chocolate for quick snacking delights. (I affectionately call the dipped Teddy Grahams “Bears in Pants” in a techno rhythm on repeat!)

I’ve also worked to improve my baking of Pain au Chocolat, Cinnamon Croissant Buns, and Scones. I’ve also launched some of the fudgy-iest brownies I’ve ever encountered.

I’ve expanded my drinking chocolate kits to closely match my bar lineup.

I’ve introduced lots of folks to Cocoa Tea, the roasted and winnowed shells of cocoa beans.

I got to partner with Tulip Tree Creamery and Pilgrimage Wine Company to pair up our chocolate, cheese, and wine offerings for a fundraising event to support the Soup Kitchen of Muncie.

All of these opportunities have been so much delicious fun!

But I’m unfortunately limited by being a home-based vendor…

I can’t wholesale or distribute and I can’t retail outside of my home state of Indiana and I know that some of you who may be reading this are not in Indiana so it makes it difficult to get my products to you.

Maybe I can return to a certified kitchen or, dreamily, a manufacturing space with a retail cafe again, but I’m in no rush as I don’t want to overextend my capacity (which is already limited with the day job and a recovering knee).

Even with limitations, though, and even with a long delay, I’m very happy and proud to say that I’m back!

Queer Chocolatier is remaining unapologetically indulgent with yet another pivot in a long series of pivots!

And if you’ve made it this long in reading this post, I want to thank you for continually showing up and sticking by my side! I appreciate you more than I can express.

It really has been a long time, y’all!

I hope I can be a part of your holiday celebrations and gift-giving moments, even while things are hard everywhere. Let me know how I can bring you a little bit of joy in the dark stretches and let me know how I can be in solidarity with you in the difficult era we are in.

Lots of love from me to you!

Chocolate House, cocoa wonkery

The Journey from Cacao Tree to Cocoa Bean to Chocolate Bar

The Journey from Cacao Tree to Cocoa Bean to Chocolate Bar

IMG_20201207_054659_446.jpg

Settle in for a deep, nerdy dive into exploring the journey chocolate travels to arrive to your hands! It is a LONG journey and I hope that knowing all the steps along the way makes this bit of indulgence something to appreciate even more than you already do!

It truly is a long journey, so before I delve right in, here is a road map of the steps (and approximate time for each step) along the way for you to see where we are headed:

  1. Planting and growing cacao tree seeds and saplings (5-7 years)

  2. Harvesting cacao pods (varies, but occurs over the course of a year)

  3. Fermenting cocoa beans (3-8 days)

  4. Drying beans (5-10 days)

  5. Packing and Transporting beans (2-3 weeks)

  6. Sorting beans (1-2 hours, depending on how big a batch)

  7. Roasting beans (20-45 minutes)

  8. Cracking beans and Winnowing shells (15-60 minutes)

  9. Grinding and refining cocoa nibs (18-24 hours)

  10. Resting and aging chocolate (1 day to several weeks)

  11. Tempering and molding chocolate bars (1 hour to several hours, depending on scale)

  12. Enjoying chocolate bars (almost instantaneously)

Let’s go!

Seed-to-Tree-to-Beans

Planting and Growing

Before your chocolate bar became chocolate—a minimum of anywhere between five and seven years before—a seed from a cacao pod was planted.

But it wasn’t just planted anywhere.

Cacao grows in a narrow band around the equator, roughly 10 degrees latitude above and below, and this region is colloquially known as the Cocoa Belt. The main parts of the world that produce cocoa are West Africa (especially Côte d’Ivoire and Ghana), Indonesia, Latin America (countries such as Ecuador, Guatemala, Venezuela, Peru, Honduras, and Colombia), Madagascar, Tanzania, Vietnam, and India. Hawaii and Puerto Rico are the only places among the United States that are capable of cocoa production.

Cacao tree seedlings grow alongside other vegetation; perhaps some banana trees or other tropical fruits and flora which can provide some shade cover for the cacao tree and crop diversity for the farmer.

A cacao tree can live up to more than a hundred years old but be fruitful for almost half of that time, with some variations to take into account.


Harvesting

After those initial five-ish years passed, the tree begins to produce fruit and cacao pods are finally harvested.

Cacao pods are really quite pretty with their wide range of colors, from greens to yellows, oranges, reds, and even deep purples. Typically, they are about the shape of an American football, that is to say they are oblong with tapering at the ends. They can range in size from about 6 to 12 inches in length.

Cacao or Cocoa? I take my cue from those who follow the delineation at the point of harvest, prior to harvest is cacao and post-harvest is cocoa as the transformation begins here.

Split cocoa pod with fresh cocoa beans and pulp

Relatively speaking, cacao trees are not especially tall, about 15 to 25 feet or so, and their pods grow all slapdash on the trunk and the branches making some of the harvest possible simply by using a machete. For the pods higher up on the trees, a hooked blade on a pole is skillfully used with delicate precision.

Great care must be taken during harvesting so that the flowers that have been pollinated and will turn into pods for next year's harvest are not injured or damaged.

Not all pods ripen at the same time and the farmer must know when the pod is fully ripened before harvesting. It takes a lot of knowledge and skill to recognize which pods are ready, how to reach them for harvesting, and not to harm the tree thereby decreasing next year’s yield.

I don’t know about you, but I’m already exhausted!

Fermentation

Cocoa pods are split open to reveal the seeds and pulp inside. Cutting into one feels akin to cutting open a winter squash as the pods have a thick rind. The pulp has a sweet, tropical flavor to it; being a Hoosier from a temperate climate, tropical fruit doesn’t abound here but my best comparison to the flavor is something close to a mix between kiwifruit and pineapple! I personally enjoyed the flavor!

But how do cocoa seeds turn brown and lose its tropical fruit profile?

Via fermentation.

The beans are placed into large fermentation boxes and remain, stirred occasionally, for anywhere from three to eight days.

During this period, the sugary pulp that engulfs the beans serves as fuel for ambient microbes and sparks the fermentation process.

The beans, from the fermentation process and the pressure of all the weight of beans stacked into the boxes, can reach temperatures upwards of 120° F. That heat is what also halts the germination process of the beans.

Beans or Seeds? Cocoa beans are actually the seeds of the cacao tree but when Europeans first experienced cacao, they erroneously called the seeds “beans” and the mistake took root as the word to call them.

Without this fermentation step, the beans would never develop that familiar chocolatey flavor we recognize. It is an entirely transformative process.

Many experts argue that this step is, in fact, the most crucial of all and is where many craft chocolate makers send agronomists on site to work with farmers to improve their fermentation of their beans.


Drying, Packing, Transporting

Once fermentation is complete, the beans are then spread out to dry.

Ideally, the cocoa beans will be sun-dried, but tunnels for machine drying and wood-fired drying are also common in some cocoa growing regions.

After all, much of the Cocoa Belt is contains rain forests!

Beans take a few days to dry to reach the desired moisture levels so that they are safe to transport with minimal risk of harmful microorganisms growing.

Dried beans are packed in large sacks (40-70 kilograms) and transported to the chocolate makers.

Baby’s first sack of beans! A 50kg sack of cocoa beans from Tumaco, Colombia.

Baby’s first sack of beans! A 50kg sack of cocoa beans from Tumaco, Colombia.

(In some cases, this step is actually more complex than I provide here, as beans are often sold in cooperatives so they are gathered in a central area and sorted, blended, and packed here to prepare for transport. And, especially in the case of bulk beans, there are commodities traders and importers/exporters that are involved in the shipping and purchasing of beans before they reach the manufacturing plants.)

More often than not, the chocolate makers are not in the same country as the one in which the beans were grown, but there are growing numbers of chocolate makers that are in-country and thereby keeping more of the revenue within their borders. Whenever possible, support chocolate that is made in-country where the cacao is grown and help decolonize cacao!

Bean-to-Bar

FINALLY!!

Now the beans have arrived in the waiting hands of a chocolate maker!

Hopefully, you can see how many steps there are along this journey already, even before that chocolate maker gets to glorious work!

Sorting and Roasting

Second only to fermentation, the roasting of cocoa beans is a crucial stage of flavor development.

But, before a chocolate maker embarks on this step, the beans must be sorted and separated from undesirable items that came along for the ride; sometimes bits of burlap, stones, sticks, or other sundry items will stowaway, and there are also defective beans that need to be discarded.

Once all the good beans are remaining for the roast, the chocolate maker decides the roast profile preferred for the batch of beans. Roasting can be done using a number of different methods, from a skillet on an open flame, to an oven, to a heat gun, to a refurbished and retrofitted coffee drum roaster.

But why roast at all? (Please, let's not get into the current “raw" chocolate trend today, but perhaps another day…)

Good roasting accomplishes three goals:

  • kills residual bacteria from the fermentation process,

  • further reduces the moisture content of the cocoa beans (the drying step only brings the moisture content to around 8%),

  • and, most importantly, develops flavor

A roast profile consists of time and temperature; high heat for a quick time or “low and slow” will result in very different flavors in the beans. Adjusting those variables will also result in different outcomes, and so will the humidity in the room, the size and residual moisture of the beans, the type of bean and its origin, and the will of the universe.

Approaches to roasting is a matter of preference and a bit of artistic expression albeit in a science-y sort of way.

One can think of the approach to roasting cocoa beans as similar to that of roasting coffee beans, but there is a considerable bit of difference between coffee and cocoa beans, one being cocoa beans consist of roughly 45% cocoa butter (fat) and coffee bean lipid content is much lower, somewhere between 10-17%. Cocoa beans, with their higher fat content, are more susceptible to burning and have to be roasted at relatively lower temperatures.

Craft chocolate makers take great care (and pride) in dialing in on an excellent roast that highlights unique properties of specific beans. Mass-produced chocolate companies care less about this and will often over-roast beans as a way to get a more unified, consistent flavor and adjust the overall product flavor when mixing the cocoa beans with other ingredients.

Quite a contrast!

Cracking and Winnowing

After the roasted beans have cooled off, the papery shells must be removed before the grinding stage.

This can be done manually (and is incredibly painstaking!) but there are specialized machines that can have the beans pass through in order for them to be cracked, then separating the shell from the bean, and blowing the shell away while reserving the cocoa nibs for further processing.

A winnower machine consists of a hopper that holds cooled roasted cocoa beans that feed into a cracking machine (in this case, a juicer) and the cracked nibs and shells fall into tubing that diverts nib from shell via a vacuum, collecting usable nibs. Photo cred: Rylan Capper of Ball State Daily News

A winnower machine consists of a hopper that holds cooled roasted cocoa beans that feed into a cracking machine (in this case, a juicer) and the cracked nibs and shells fall into tubing that diverts nib from shell via a vacuum, collecting usable nibs. Photo cred: Rylan Capper of Ball State Daily News

The shell is waste, but can be used for garden compost.

Ideally, the cracked nibs have been reserved without too many being included in the shell and vice versa. FDA standards dictate that the percentage of shell in the resulting chocolate cannot exceed 1.75% by weight but nibs getting mixed with husks is just wasted nibs.

I hate wasting nibs…

Grinding and Refining

Melangers (derived from the French word mélange meaning “to mix”) are frequently used to make chocolate as we know it by grinding and refining cocoa nibs and later adding sugar (and any additions such as powdered milk, melted cocoa butter, and dried flavorings such as cinnamon).

The melangers vary in size, with some able to sit on a countertop and others filling entire rooms.

The grinding process is a lengthy one, lasting approximately a full day, give or take a couple of hours.

The primary goal of grinding is to break down the beans into a liquified state where particles are around 10-20 microns (smaller than the width of a hair) so that the feel of the chocolate is perceived as smooth liquid and not grainy. Although, there are purposefully grainy chocolates that are in the style of handmade Mexican chocolates which are quite delicious!

At the point when the nibs have broken down, the substance is referred to as “chocolate liquor” although there is no alcohol present. Adding sugar and cocoa butter at this stage is the beginnings of transforming into chocolate.

Smaller-scale chocolate makers almost exclusively use some sort of melanger while larger chocolate producers (including large scale craft chocolate producers) will use a ball mill instead. Melangers have a maximum capacity whereas ball mills can be continuously fed with virtually no capacity limits.

There is a lot of time saved in using a ball mill, so I’m told, but I am also learning that they are a bear to clean and you have to be making a lot of chocolate to make the process worthwhile. A ball mill is essentially a tower that is filled with ball bearings that work to beat up and grind cocoa nibs as they are poured in from the top and process downward through gravity. They are outfitted with a water jacket to help regulate the internal temperature and also have a pump at the bottom to help recirculate chocolate liquor back through the top of the ball mill.

Although, melangers refine the chocolate simultaneously as grinding and allow for smaller-scale chocolate makers to sort of skip on the separate step of conching.

Conching

Conching is a process that is not always performed as a distinct step; as mentioned before, melangers can do some of the refining while grinding the nibs.

The name comes from the early machines that were used in the process; the shape of the machines resembled conche shells and the name took hold.

However, when performed as a stand-alone step in the process, conching involves polishing the chocolate, reducing or ultimately eliminating any lingering off-flavors to round out the finished chocolate.

Roasting develops flavors but doesn’t completely get rid of some of the vinegary notes that stick with the unrefined nibs. If a chocolate maker under-roasts and underrefines, you might get the sensation of taking a shot of vinegar that had just a hint of chocolate mixed in. Not altogether the most unpleasant thing for some people, but it is not the desired outcome for chocolate makers.

Conching helps provide chocolate that rounded, enjoyable mouthfeel and flavor that feels somehow more finished and complete.

Tempering and Molding

The home stretch of chocolate making is tempering and, if making bars, molding.

Tempering chocolate is perhaps the most intimidating process in handling chocolate. Ask anyone who works with chocolate about any story they might have involving tempering and you’ll likely get something akin to a therapy session!

The most comforting thing is that no matter how much you might mess up tempering by hand, you can always start over without wasting chocolate!

Tempering chocolate by hand on a granite slab. Photo cred: Cheri Madewell

Tempering chocolate by hand on a granite slab. Photo cred: Cheri Madewell

So, what actually is tempering?

It is the process of raising the temperature of chocolate to melt it all to an exact temperature, then cooling it rapidly and warming it again slightly.

Why go through the heating, then cooling, then heating all over again?

Chocolate, on a molecular level, consists of crystals, six possible varieties in fact. But not all of the crystals are the same or equally desirable. Tempering allows for all of the crystals to melt, then reform into the ideal version and align favorably so that when the tempered chocolate is molded and cooled, the chocolate will have a desirable shine and snap.

Chocolate that isn’t tempered will not be desirable in appearance and will be difficult to work with to make confections. It will not have a shine to it and will begin to develop fat bloom, which is that mottled whiteish coloration on the surface of chocolate. The cocoa butter has simply risen to the surface and cooled in such a way that it is separate from the rest of the crystalline structure of the chocolate. It isn’t spoiled but it just isn’t pretty anymore

Tempering is necessary when molding chocolate bars as well.

Molding chocolate bars can also be done by hand, like tempering, but to create bars at a larger scale, machines can temper chocolate and hold it in temper until ready to use while other machines can dispense tempered chocolate into prepared molds.

Enjoying Chocolate Bars

After bars are molded, packaging them for purchase (by hand or machine, again) is the final step on the journey of delivering chocolate to the hungry consumer!

In a future post, I’ll discuss more about how to read a chocolate label in order to be able to understand what can be learned from the details printed on (or left off) the label.

Too few labels, however, tell the consumer the story of how their chocolate bar came to be. But now you have a better sense of the fullness of the journey, from seed-to-tree-to-bean-to-bar!

Tasting chocolate also has some steps in and of itself; Queer Chocolatier offers a Guided Chocolate Tasting Event that walks you through these steps intentionally so that you can appreciate the journey that chocolate bar traveled to get to you. When tasting chocolate purposefully, with the goal of picking up as much nuance and detail as possible, you can taste the effects of how chocolate was roasted and even more about the region in which the cacao was grown.

Enjoying chocolate bars can allow for a delicious reflection on how much transformation and labor and craft the chocolate underwent and, to me, that is a beautiful gift that I now get to enjoy receiving as well as giving as a chocolate maker!